Introduction
First of all, welcome to the Apache ServiceMix project!
The goal of this Quickstart guide is to give you a 20-minute overview of what ServiceMix is and what you can do with it. In that time, we'll install ServiceMix on your machine, deploy some basic integration routes and extend the container with an additional feature.
Installation
Before we can start working with Apache ServiceMix, we have to get it installed and running on our local machine first.
System requirements
For running Apache ServiceMix itself, you'll need
Java Runtime Environment (JRE) 1.6.x (Java 6) or
Java Runtime Environment (JRE) 1.7.x (Java 7)About 100 MB of free disk space for the default assembly
If you're developing your own integration applications and OSGi bundles, you'll also need
Java Developer Kit (JDK) 1.6.x (Java 6) or
Java Developer Kit (JDK) 1.7.x (Java 7)Apache Maven 3.0.4 or higher
Downloading Apache ServiceMix
Apache ServiceMix 5.0.0-SNAPSHOT is available under the Apache License v2 and can be downloaded from http://servicemix.apache.org/downloads.html.
Depending on your operation system, you should download either the tar.gz or the zip file:
tar.gz for Linux/Unix/MacOS X
zip for Windows
Installing Apache ServiceMix
Installing Apache ServiceMix is as simple as uncompressing the downloaded archive on your hard disk. For the rest of this guide, we'll refer to the this location as <SERVICEMIX_HOME>.
Starting Apache ServiceMix
Depending on your platform, start Apache ServiceMix by following the instructions below. After starting the container, you will have access to the console from which you can manage the container.
On Windows
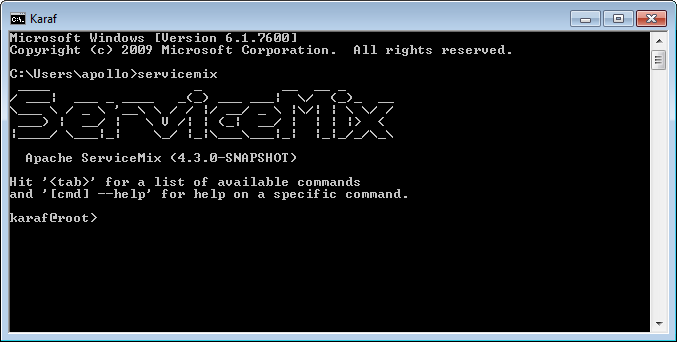
In a command prompt window, navigate to the directory where you extracted ServiceMix and run the bin\servicemix.bat file.
Example: if ServiceMix in installed in the c:\tools\apache-servicemix-5.0.0-SNAPSHOT directory
> cd c:\tools\apache-servicemix-5.0.0-SNAPSHOT
> .\bin\servicemix
On Linux/Unix/MacOS X
On a command shell, navigate to the directory where you extracted ServiceMix and the bin/servicemix shell script
Example: if ServiceMix is installed in the ~/Applications/apache-servicemix-5.0.0-SNAPSHOT directory.
$ cd ~/Applications/apache-servicemix-5.0.0-SNAPSHOT
$ ./bin/servicemix
!/quickstart/images/start-linux.png
|width=75%|height=75%!Apache ServiceMix console
Now that we successfully installed and started Apache ServiceMix, we'll take a closer look at the console. This is where you manage your ServiceMix instance, add and remove bundles, install optional features, ...
Working with bundles
When ServiceMix is first started, a whole set of bundles providing the core features for the product are being installed. Let's use the command console to find out more about them...
The osgi:list command can be used to get a list of all bundles currently installed. Enter this
karaf@root> osgi:list
This is what the output looks like if you run this on your ServiceMix instance.
!/quickstart/images/osgi-list.png
|title=osgi:list!For every bundle, you see:
the bundle id
the bundle state
if the bundle contains a Blueprint or Spring XML file, the next 2 columns will show you if the beans defined there were created successfully
the bundle start level
the bundle name and version
If you're looking for something specific in the list, you can use unix-like pipes and utilities to help you. An example: to look for all Camel related bundles...
karaf@root> osgi:list | grep camel
!/quickstart/images/osgi-list-pipegrep.png
|title=osgi:list!Working with logging
Many of the applications you write will have some form of log output. To look at the message in the log file, you can us the log:diplay command.
karaf@root> log:display
!/quickstart/images/log-display.png
|title=log:display!If you're only interested in the latest exception in the log file, you can use log:display-exception instead.
karaf@root> log:display-exception
!/quickstart/images/log-display-exception.png
|title=log:display-exception!You can also change the log level at runtime by using the log:set command. You can try these commands on your instance now by first setting the log level to DEBUG and then using grep to make sure that you can actually see the extra logging.
karaf@root> log:set DEBUG
karaf@root> log:display | grep DEBUG
!/quickstart/images/log-set-debug.png
|title=log:set DEBUG!Afterwards, revert the log level to its original INFO value again with log:set.
karaf@root> log:set INFO
...and there's a lot more
These are obviously just a few examples of what the command shell is all about. There are a lot more commands in the shell to help you deploy, monitor, manage and troubleshoot the applications you're building with ServiceMix.
Using Camel
Now that we know how to operate Apache ServiceMix through the shell console, it's time to start using it for what it is built for. Let's build our very first integration solution with a Camel route and deploy it on ServiceMix.
Our simple scenario
In this simple scenario, we're going to move files from an input directory called camel/input to an output directory called camel/output. To ensure we can keep track of which files get moved, we'll also write a message to the log file whenever we move a file.
Creating the route
One of the most simple ways to deploy a new route on ServiceMix, is by defining the route in a Blueprint XML file.
<?xml version="1.0" encoding="UTF-8"?>
<blueprint
    xmlns="http://www.osgi.org/xmlns/blueprint/v1.0.0"
    xmlns:xsi="http://www.w3.org/2001/XMLSchema-instance"
    xsi:schemaLocation="
      http://www.osgi.org/xmlns/blueprint/v1.0.0
      http://www.osgi.org/xmlns/blueprint/v1.0.0/blueprint.xsd">

    <camelContext xmlns="http://camel.apache.org/schema/blueprint">
      <route>
        <from uri="file:camel/input"/>
        <log message="Moving ${file:name} to the output directory"/>
        <to uri="file:camel/output"/>
      </route>
    </camelContext>

</blueprint>
Deploying the route
In order to deploy and start the route, just copy the XML file you created into ServiceMix' deploy directory. The file will get picked up and deployed by ServiceMix. You will see a camel/input folder appear in your ServiceMix installation directory and any files you copy into that directory will get moved into the camel/output directory.
If you do a log:display in the shell, you will also see the log output for every file that's been moved.

Using the shell to manage the route
Using osgi:list, you'll notice that your XML file has been transformed into a bundle and that the Blueprint container has been created to start your Camel route.

From this output, you also learn that the bundle id for your XML file is 200. This allow you to start and stop the route whenever necessary. Let's give this a go now...
First, stop the route with
karaf@root> osgi:stop 200
The route is no longer active, so any files you copy into the orders/input folder will remain there for now. As soon as you restart the route, the pending files will get moving again.
karaf@root> osgi:start 200
Adding ActiveMQ to the 'Mix
Out-of-the-box, every Apache ServiceMix instance comes with an embedded ActiveMQ JMS broker. This makes it easy to communicate between Camel routes using persistent messages on the same machine, but it will also enable you to distribute your routes over multiple instances afterwards for clustering or load-balancing.
Our scenario
In this scenario, we also want to move files between directories. Instead of logging the move directly, we are going to send an event JMS message onto a queue. Afterwards, we will create a second Camel route to receive the events and log them.
Moving files and sending event messages
The first Blueprint XML file we'll create contains a Camel route that moves the files from activemq/input to the activemq/output directory. Afterwards, it will generate an event message and send that to an ActiveMQ queue called events.
<?xml version="1.0" encoding="UTF-8"?>
<blueprint
    xmlns="http://www.osgi.org/xmlns/blueprint/v1.0.0"
    xmlns:xsi="http://www.w3.org/2001/XMLSchema-instance"
    xsi:schemaLocation="
      http://www.osgi.org/xmlns/blueprint/v1.0.0
      http://www.osgi.org/xmlns/blueprint/v1.0.0/blueprint.xsd">

    <camelContext xmlns="http://camel.apache.org/schema/blueprint">
      <route>
        <from uri="file:activemq/input"/>
        <to uri="file:activemq/output"/>

        <setBody>
          <simple>
            FileMovedEvent(file: ${file:name}, timestamp: ${date:now:hh:MM:ss.SSS})
          </simple>
        </setBody>
        <to uri="activemq://events" />
      </route>
    </camelContext>
</blueprint>
Save this file in ServiceMix' deploy folder and use osgi:list to check on the bundle status as you did with the simple Camel example. You should now be able to put files in the activemq/input directory and see them being moved to activemq/output.
Receiving the event messages
After deploying the first XML file, you're obviously not seeing any events being logged yet. The event messages are sent to an ActiveMQ queue, but there's nobody to receive the events yet. Let's change that now by creating a second Blueprint XML file.
<?xml version="1.0" encoding="UTF-8"?>
<blueprint
    xmlns="http://www.osgi.org/xmlns/blueprint/v1.0.0"
    xmlns:xsi="http://www.w3.org/2001/XMLSchema-instance"
    xsi:schemaLocation="
      http://www.osgi.org/xmlns/blueprint/v1.0.0
      http://www.osgi.org/xmlns/blueprint/v1.0.0/blueprint.xsd">

    <camelContext xmlns="http://camel.apache.org/schema/blueprint">
      <route>
        <from uri="activemq://events"/>
        <to uri="log:events"/>
      </route>
    </camelContext>
</blueprint>
As soon as this second file has been deployed, you'll start seeing the event messages in your log:display output.
Using the shell to manage the routes
You can now start and stop both routes from the command shell. The important thing to note here is that you can stop the event handler route while files are being processed. As soon as you restart that bundle afterwards, you'll receive the events from all files that have been moved while the route was not running.
Optional features
Everything discussed in the quickstart guide so far is installed out-of-the-box in Apache ServiceMix, but we also have a lot of optional features that can be installed in the container when necessary.
List of features
The list of features is available with the features:list command. The overview shows you whether or not the feature is currently installed, the version and the name of the feature.
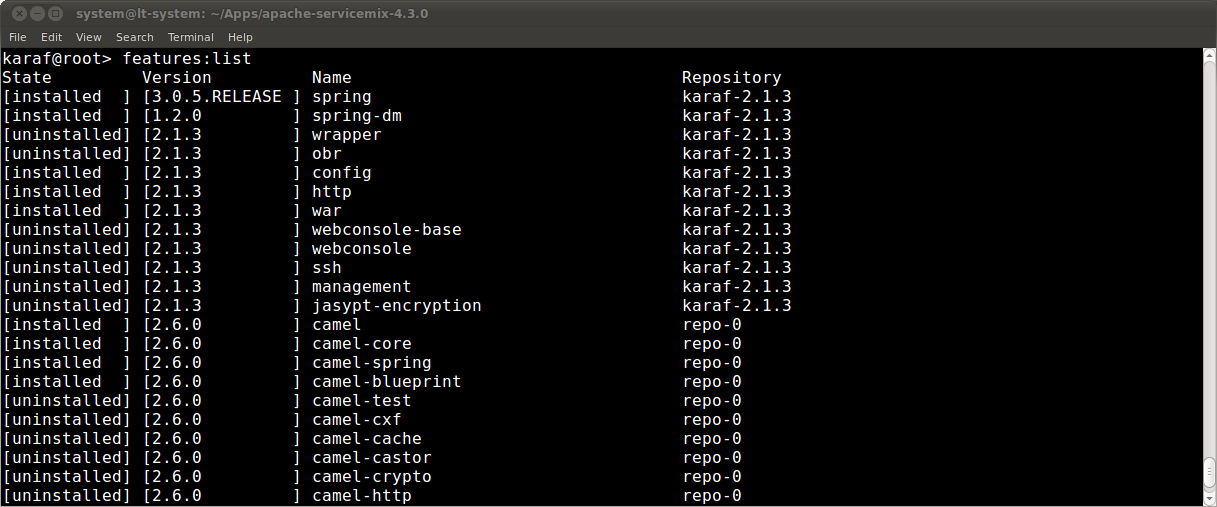
The full list contains a lot of different features: optional Camel components, features for adding OBR or wrapper support to Serviceix, a web console, ... Again, you can use things like {{
|}} and grep to find the things in the list that you're interested in.karaf@root> features:list | grep camel
Example: Web console
To get the web console installed in ServiceMix, install the feature from your console
karaf@root> features:install webconsole
Afterwards, you can verify that the feature is marked installed in the overview. You'll notice that the webconsole-base feature has also been installed as a requirement for the webconsole feature itself.
karaf@root> features:list | grep webconsole

You will now be able to point your browser to http://localhost:8181/system/console and login with user smx and password smx to access the web console. From the webconsole, you can also start and stop bundles, install optional features again, ...
Wrapping it up...
This is where our introductory journey through the world of Apache ServiceMix ends. We've obviously just scratched the surface of what is possible, but we hope you have an idea of what you can expect from Apache ServiceMix and how you can use it in your environment.
For more in-depth information, have a look at our set of user guides. Also, if you have any questions, we welcome you on our user mailing list!